Tuesday, December 11, 2018

GM Tech2 Scanner Clone Review on Corvette C5

US$259.00
Here has a lot of folks give 5star,I believe folk's choice.
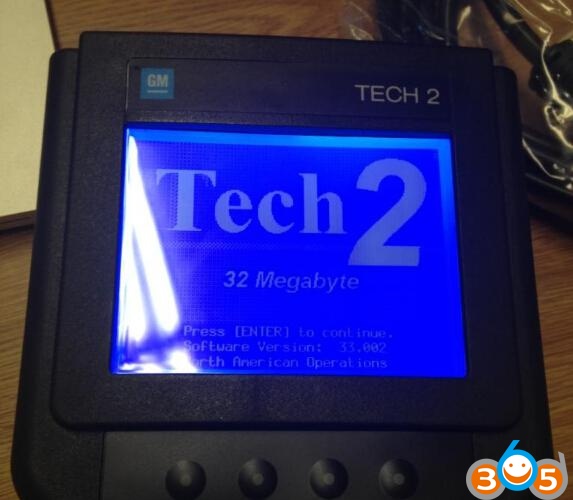
It is in perfect working order and has the screen cover.
Also included is the TIS2000 software which you will need to access the security to program keys. 
gm-tech2-Corvette-C5-2
My Tech 2 (clone, works great) for my C5 (99) just for the Automated Bleed so I could completely flush the brakesystem particularly for the EBCM !!! Have since used the crap out of it, ECM/PCM re-learn, crank sensor re-learn etc !!!!
Also use it to exercise my ABS motor every 3 months.
C5 has the built in ability to pull vehicle specific DTC’s right in the DIC and those can be exceptionally helful in diagnosing and correcting common C5 issues.
There are a number of functions in addition to diagnostic trouble shooting that can be accomplished with the Tech II.
and another is the ability to program out unwanted features such as F45 or F55 RPO’s ar program RPO’s into a replacement BCM.
Do recognize that the tool have extremely limited ability to change settings in either the PCM or BCM. To accomplish change you need a programming tool such as HP Tuners or EFI Live and they can change only PCM settings.
they’re very easy to use,just follow the display,and look around till you get tired,,and try reading ”live data” as much as you can,it speeds up the learning curve,,and try it on as many GM cars/trucks as you can too.
gm-tech2-Corvette-C5-1

Monday, August 20, 2018

FAQs: Mongoose Pro GM II Diagnostic & Programming


Here are a lot of questions and answers of Mangoose Pro GM II (the dealer or the copy), including software compatible (Tech2Win and GDS2), comparison with GM MDI & Tech 2 & Snap On Solus, diagnostic & programming & reprogramming issues….


I prefer Mangoose Pro II because of price...what do you think..will it work with my corsa d without problem? Or GM MDI better?
GM Mangoose PRO only for Opel/Vauxhall/GM with Tech2Win and GDS2.
Full coverage diagnostic and SPS programming
GM MDI can be use as a passthru for other software too
This is one of the difference
Both are good

I really just want to know what software and equipment I need to get me going with the GM Cars I actually have for diagnostics and programming.
GM Tech2 scanner or Tech2 software can used with gds2 or mvci, genuine is little high, but cheaper you can get from chine,
other is Mongoose Pro GM II, depend what exactly you want to do.

Is this Mangoose Pro GM 2 that is listed on Drew’s website?
Yes, this is the same as the Mongoose Pro GM2.

Can you buy the china clone of Mangoose GM2? If so, how much are they?
I bought mine for 70usd off obdii365.com

Will this interface perform diag. and programming on GM Global A vehicle (with SPS and GDS2)
Yes, the Mongoose Pro GM II will work with SPS, GDS2 and Tech2Win.

Is the MongoosePro GM II compatible with “Data Bus Diagnostic” Tool software?
Drew Tech has stated that as of early March 2015, the Mongoose Pro GM and the CarDAQ-M are both compatible with GM’s “Data Bus Diagnostic” Tool software.

When using Mangoose Pro GM II to SPS programming, does it program at the same speed as the GM MDI?
The MongoosePro appears to flash as quickly as the MDI.
The MongoosePro GM is definitely quicker than the Tech 2.
The MDI cost 4x more than the MongoosePro GM II but it is not 4x faster.

I have TIS2WEB, Tech2WIN, GDS2 & MDI. Is the MongoosePro GM II plug and play or does it needs to be configured?
The MangoosePro GM II is plug and play. Make sure to install the Tech2Win driver if you want to use the application.

Can this product be used as a replacement for mdi? Used for Tech2win and gds2?
MongoosePro GM II is compatible with Tech2win and GDS2 software for scan tool diagnostics, and it will flash GM-vehicles.
The MDI is a separate tool that is also compatible with Tech2win and GDS2.
Yes, the MongoosePro GM II is a replacement for the MDI.
Both tools do flashing.
Also, both tools require a subscription

Can you guide me the way to install Mangoose GM software?
First thing you need to do with this setup is access the Tech2Win driver settings.
Next trick I think is how to get security access.
In detail…

Can the MDI do more than Mongoose Pro GM II can?
I already have a Tech 2 and a GM subscription and I need to be able to do the newer GM’s. Is there any reason not to buy this instead of the MDI? Will I be missing anything?
The Mongoose Pro GM II ALMOST does everything the MDI does. Currently that is:
– Module reflashing with SPS
– Diagnostics with Tech2Win software
– Diagnostics with GDS2 software.
UPDATE: The GDS2 software package includes the data bus diagnostic tool. Using the data bus diagnostic tool, the MDI will allow you to see voltage levels on the data bus, the Mongoose will not. The Mongoose will run the data bus diagnostic tool, but only partially.
Bosch corporate provides no support for installation and use of the MDI with GM software.
Drew does.
This is the big price difference.

Which tool do you recommend performing “advanced functions” on GM VehiclesThe cars I have are a 2003 Monte Carlo SS, and a 2009 Cadillac STS.
In order to perform “advanced functions” on GM Vehicles you are going to need something that talks with all the computers on the GM Vehicle.
The ones that I know of that do this are:
1) GM Tech 2 (will handle everything including programming the computers “updating calibrations”) This tool is being phased out but it’s still supported until they can get the MDI fully operational. Either way this works Stand Alone without a Laptop/PC.
2) GM MDI (Some say there are limitations with some model years but others say it’s better since the updates) Of course using Tech2Win to mimic what the GM Tech 2 does) – This performs like a J2534 Programmer as a Pass Thru Device. DrewTech and companies like Ease Diagnostics make J2534 Pass Thru Devices that will do this as well. And they sell their own flavor of Diagnostics Scan Software. Keep in mind only the GM stuff will do EVERYTHING for GM Vehicles.
3) Snap On Solus (This will do a lot not only on GM Vehicles but others as well. And it can do some of the advanced functions like Automated Brake Bleed on the ABS unit just like the GM Tech 2 and GM MDI) – Keep in mind there are many functions that the Snap On won’t do. The Tech 2 and MDI will allows you the option to access and control everything on GM Vehicles.

4) Mongoose Pro GM II (It can do things as GM MDI does.) Even the cheap Mangoose China clone is able to recover and reprogram modules perfectly and works with the newer h***ed 2017 GDS2!!!


In summary, Magoose Pro GM II features:

Plug and play: yes!
GM diagnostics and programming: confirmed!
Module recover and reprogramming: confirmed!
SPS programming speed: fast!
“Data Bus Diagnostic” Tool software: compatible!
Tech2win, GDS2, SPS: compatible!
Mongoose Pro GM II ALMOST does everything the MDI does!


Thursday, August 16, 2018

CANdi adapter for Tech 2: What’s it? Why? How to use/communicate?

CANdi adapter user manual for  GM Tech 2 clone scanner:

What’s the candi module?
What is the real purpose of the candi module?
What is the CANdi module used for?
What’s the physical interface and LED?
“NO CANDI Communication Established”?


What’s the candi module?
An industry change in protocol from OBD II to Controller Area Network (CAN) is ongoing. In order to perform diagnostics on a vehicle that uses the CAN interface, you will need the Tech 2 and a CAN diagnostic interface module. The CANdi module connects between the Tech 2’s diagnostic link cable and the OBD adapter.
candi-module-function-1
candi-module-function-2
The Controller Area Network Diagnostic Interface (CANdi) is an in-cable module that works with the existing Tech 2 components including the VCI, cables and adapters. Installed, the CANdi module is fully backward compatible with current tester functionality. The module powers up in a way that makes it transparent to the user.
That is, unless the Tech 2 enables features specific to the CANdi module. This allows the existing Tech 2 software to be used with no changes, whether or not the CANdi module is installed.


What is the real purpose of the candi module?
The CANDI module reads the CAN Network on cars that have it. Corvettes 2005 and newer use the CAN Network. Still use a OBDII connector but the Candi module is needed to read the data on the CAN Network.

What is the CANdi module used for?
The primary function of the CANdi module is to add CAN capability to the Tech 2 scan tool.
The CANdi module:
– support simultaneous communications on three CAN buses
– provides high speed UART communications with Tech 2
candi-module-connection
What’s the physical interface and LED?
CANdi adapter connects the Tech II by way of the existing Data Link Connector (DLC) Burndy Connector. The vehicle side connection remains unchanged using the existing adapter to interface between the Burndy connector and the SAE J1962 connector. When functioning properly, CANdi’s LED flashes. In the vent of a problem,the LED will be constantly illuminated.
candi-module-led-light-1
candi-module-led-light-2
How will you do with “NO CANDI Communication Established”?

How-to’s of CANDI module communication errors:
“CANdi module was not detected for Tech2”
Or
“NO CANDI Communication Established”
candi-module-no-communication
First, please make sure you plugged the candi adapter in to the car and the tech 2 before powering up

Then, disconnect the connector leaving the candi adapter going to the OBD port. Plug it back in and make sure its real snug, then plug it into the obd port. I need to do this every now and then with my clone one. Usually it works after. Suspect the pins arent making the best contact.

Tech support from professionals:

  1. With the car ignition off, connect the GM Tech2 and CANdi module (which is now one long cable).
    Power up the Tech
  2.  You’ll get 12V from the DLC (now it takes me a half hour to find the “DLC means” Data Link Connector “and is what we also call the OBD2 connector, so be prepared to be stumped by TLA’s (Three Letter Acronyms)
  3. At the main menu press F3-tool options
  4. At the tool options screen select F9, CANdi Diagnostics
  5. There are two tests on the next screen, run them both. The CANDI should talk to your 2004+ car
  6. Either turn the ignition key of the car, or start it (for a C6 there is not an “on”).
  7.  Press the EXIT button until the Tech 2 goes back to the main menu.
  8. Select F0, Diagnostics.
  9. Make sure you want to look at the module. You may be choosing body style; You may need the body code (sometimes the third character in the VIN) You may also be asked about certain options, like ZL6. They are on a tag in the glovebox.
  10. After that you will be able to play with the Tech2 clone.

IMPORTANT: Sometimes, it’s just problem with candi, as when using on other cars without candi, it’s just perfect. So you should have a good candi such as . It’s just better, but still needs to connect a few times. So I you can buy another card 148. If not totally solved, rewrite the card to 143 and 136. Both work fine. That is, 148 is no good for candi. Could be corrupted software, or the card problem. These cards coming together with Tech 2 are not good sometimes. You’d better but china knock-offs from a man of his word to trust in. Here, obdii365.com is one of them you can go with.

Wednesday, August 15, 2018

Tech 2 and OPCOM: which is better for Opel steering angle sensor reset?

Here are tips and guides of Opel steering angle sensor (SAS) calibration, incl SAS GM scan tools and FAQs…

What is steering angle sensor:
The steering angle sensor (SAS) is a critical part of the ESC system that measures the steering wheel position angle and rate of turn. A scan tool can be used to obtain this data in degrees. The SAS is located in a sensor cluster in the steering column.

Opel Tech 2 and Op-com, which is better for SAS reset:
With Tech2 you don’t need a PIN code.
Saab doesn’t have PIN code like Opel.
How to reset Opel steering angle sensor:

Tech 2 steering angle sensor calibration:
tech2-opel-srs-reset
Here is the procedure with Tech2:
Calibrating the steering wheel angle sensor
Note
The wheel alignment must be correct before calibration is carried out.
1. Put the wheels straight ahead.
2. Connect the diagnostic tool.
3. Select Steering Angle Sensor Calibration. Follow the instructions displayed.
4. Read and clear diagnostic trouble codes.
5. Test drive the vehicle.


Op-com steering angle sensor calibration:
opcom-srs-reset
  1. 1. Disconnect the battery and the steering angle sensor lose its basic setting
    2. Remove airbag and steering wheel following the usual precautions
    3. Move the center rotor of the CIM to align the 2 triangles
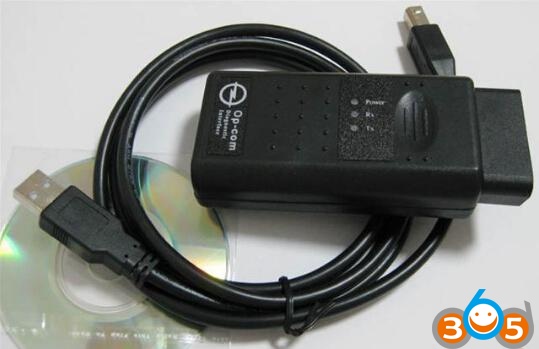
    4. Connect the op-com interface with computer via USB port than install the software
    5. Plug the op-com unit into the vehicle USB port after succeeded installing software
    6.  Op-com will turn out the ESP light but not very first and second time
    7.  Turn on the vehicle ignition switch and start the vehicle.
    8.  Drive in a short distance straight line on a level surface at the speed not higher than 20 km/h.
    9.  When the steering wheel is straight, stop the vehicle with the wheels pointed straight. Make sure the vehicle is not move again.
    10.  Come to the op-com main function menu, select “Op-com Diagnostic”>> Vehicle year “2006”>>Vehicle model “Astra-H”>>Body>>CIM (Steering Column Module. >> Measuring block 3>>Steering Angle Sensor offset – set to 0.00 by slightly moving steering wheel
    11.  Back to the CIM screen, select “Programming”. Enter the security code if the system asks for it. Then click “Yes” when the system accepts the security code.
    12.  Go back to the programming screen, select “Steering angle calibration”, if the system still showed steering angle calibrated, choose “No, choose Activate and waited”. Otherwise, select “Yes” when the system displays steering angle calibrated.
    13.  The ESP light then came on with ignition as normal and went out after a few seconds


FAQs: steering angle sensors (SAS)  

How long have steering angle sensors (SAS) been in use?These sensors have been in use on certain vehicles since the early 1990s, but became commonplace by 1998.

Why does the SAS need to be calibrated or reset after a wheel alignment?Because it is required by the OEM.

When did OEMs begin requiring SAS reset with alignment?Some as early as 2003, others as recently as 2008, though some 2008 models were specified as early as 2002. Hunter’s WinAlign software has always provided vehicle specific screens that advised technicians that special equipment and software would be required to complete the alignment.

Why am I just now hearing that SAS need service?Because many newer on-board systems such as electronic stability control and electric power steering rely on accurate input of the driver’s intentions. This input is provided by the SAS)

Why do some OEMs require SAS reset in conjunction with alignment on only particular models or model year of vehicles?Each OEM has their own specific selection criteria on which vehicles are affected.

Why don’t all OEMs require reset after alignment?Each OEM has its own service requirement criteria. Most OEMs have only added the requirement in the last few years. Some as recently as 2008.

Does the SAS need to calibrated or reset if thrust angle is not changed during the wheel alignment?Yes. Thrust angle is only one of many conditions causing the SAS to report a value other than zero when the front wheels are steered straight-ahead based on the thrust angle.

Why do some SAS reset procedures require the vehicle to be driven a given distance to complete the procedure?Each vehicle manufacturer develops the SAS reset procedure based on the technology and design of the system. In some cases, a test drive is needed for the vehicle’s ECM to verify proper operation. CodeLink will indicate which specific vehicles require a test drive.

Do SAS automatically calibrate themselves after the vehicle has been driven a given distance?On some vehicles, SAS is automatically calibrated; on other vehicles, it is not. In either case, OEM mandates determine whether SAS reset is required after wheel alignment. Always follow the OEM’s recommended service procedures.

What may happen if the SAS requires calibration or reset and the process is ignored?A variety of symptoms may result from a SAS reporting inaccurate information. Examples of such symptoms may be a shutdown of the electronic stability control system, untimely application of individual brakes, steering wheel vibration or a vehicle that drifts of pulls in one direction.


Monday, August 6, 2018

GM Tech 2 works with Hummer: Yes or No?

This is about GM Tech 2 scan tool for Hummer troubleshooting and programming.

Can I have a cheap Tech 2 for Hummer?
Yep. Both the original and HQ clone can work for your car.

Where can I get a working clone at a good price?

Why my Hummer is not shown in the GM vehicle list?
That little short list is incorrect and only shows a few of the earlier than 2007 CAN bus vehicles.

Tech 2 clone for both troubleshooting and programming Hummer?
I’ve used my Tech2 on my 08 many times for troubleshooting not programming
But I think it should be able to program Hummer.

Anyone has good success of Hummer H3?
My H3 has had a CEL on – po452. I checked it with the tech 2. Well it pulls 3 codes, po455 (large evap leak), po442 (small evap leak), and po449 (vent solenoid control).

Tech 2 is possible to program for Hummer H2 above the year 2007… what to do in that case?

Actually it does the programming just fine on newer than 2007 GM vehicles BUT you must pay for an ACDelco TDS subscription for vehicles above 2007 and you would use the CANDI module that comes with many of the Tech2’s for working with CAN bus vehicles. You can subscribe for it.
This is ONLY needed if you want to program or update the software in a module. ALL of the build in diagnostics and testing for vehicles up to 2013 works without the subscription or the older TIS2000 software. You only need those for doing actual programming. The older TIS2000 software – that is what has the programming was discontinued in 2007. TIS2000 does have the actual programming for all vehicles up to 2007. After 2007 GM went to the TDS system.
You can also get a newer style MDI or MDI 2 for diagnostics and programming. The catch with those. They have NO screen or built in software and you must pay for a subscription from from ACDelco TDS to use an MDI.
Other brand units, a very select few can do actual programming and use the pass-through method. NONE have the diagnostics that the actual Tech2 scanner or MDI interface (with the subscription) will have. Check with Autel and see if they have the full diagnostics and re-calibration for the rear air suspension on a Hummer H2. Not going to happen, there is too little demand for them to hack and reverse engineer that particular bit of code in a Tech2 to figure out the diagnostics and then write programming for that for their tool.
gm-tech2-hummer-1

gm-tech2-hummer-2

Tuesday, June 26, 2018

Tip and Guide Needed before Buying Tech 2 for SPS Programming

Hi all,
Here are all experience of Chinese GM Tech 2 interface for SPS programming and hardware key issues. You will get useful tips/guide. Have fun.

Confirm your card with a brand:
Before buying, you should tell your seller: Will you choose GM or SAAB or Isuzu or Opel card?
Because every card to one brand cars. If you want to do more brands, they will ask your pay extra fee for other cards.
Hope it be useful.

Can do programming:
Chinese clone Tech II don’t have hardware key but it can do programming

TIS2000 dongle & sw make it:
The TIS2000 Dongle( the newest one is USB flash type ) and the TIS 2000 software could do the SPS programming . usually the chinese gm tech 2 kit not included it . you should point it speartly that you need it very important . may be need more $100.0 for the dongle and software

Work for cars 2008 or older:
You should use the TIS200 dongle and software for reprogramming SPS and access Immo SYSTEM but just work for 2008 year or older. for new cars, you should use the MDI module programming online

MDI instead for new cars:
buy GM MDI instead as it will run tech2win and do sps flashing and also do latest model cars that tech2 won’t do

Must have TIS2000:
the Chinese GM Tech-2 can’t program, if you want to do programming you need to buy the TIS2000 software. It has the hardware key.

Works well for one year:
if you consider to buy one, I can suggest you buy it using the site http://www.obdii365.com/wholesale/tech2-diagnostic-scanner-with-tis2000.html , I buy it one years ago, and it works well now, and they can supply us the technical support. I use it to program with the TIS2000 software….

Works fine for 2 years:
I bought a Chinese OPEL TECH2 interface off obdii365.com, from two years now and it stills working fine. If you use the right software you wont found any inconvenience …
There’s no need of drivers and Opel tech II is an Auto exec file, so it doesn’t need to install.
I Hope it’s been helpful 4U

Both 2 units work fine:
I bought 2 units from different suppliers, both work fine, until I bought the original tech2 card from one of this suppliers It does snapshots, and programming but one of the units wont accept the card, it seems like one of the edges close to the pin connector side , is been damage well one of the problems, the main problem I think is after I use explorer manager to upload the file to the tech2 card on my laptop I did it many times with no problems it work just fine, but after that day I couldn’t it goes up to 25% and gives an error related to power , couldn’t find a card of 12v or something like that, and the other card finish fine but when when I plug to the tech2 it wont recognize the card it displays downloading mode and that it, but a clone card work fine so I use this to diagnose, ifany body knows how to do a low level format or some fix like that in order to be able to use the card again please help.
Until today I’m using tech2 clone from china it does SPS and all, still working fine I have a software emulator for dongle it works great on American NAO, Brasil, Isuzu, I do SPS on all this vehicles with no problems. just make sure you get a card for SPS, snapshots and it will work.

http://blog.obdii365.com/2018/06/26/tips-needed-before-sps-programming-with-gm-tech2/

Wednesday, April 25, 2018

GM Tech2 Service Programming what is required?

To perform service programming with GM Tech2 scan tool, you need following:

1. Tech 2 scanner
2. 5 CDs (2 default CDs in package and 3 TIS2000 software CDs)

Tech2 User Manual CD
tech2-manual-cd
GM tech2 default TIS2000 CD, no USB key, cannot program SPS
tech2-tis2000-cd

tis2000--usb-key
3. USB key security dongle
rs232-db-9-connector

4. A RS232-DB9 adapter
5. Laptop/computer with COM Port
6. Connect RS232-DB9 adapter with Tech II


GM Tech2 scanner package without TIS2000 and USB key, cannot do service programming:
tis2000-no-tis2000-usb-key

Sunday, April 22, 2018

GM Tech II and TIS200 Pass-Thru Programming Guide

This is a how-to guide on Pass-Thru programming through TIS2000 software with GM Tech2 scan tool.

What is Pass-Thru programming?

If you’re trying to program a module, there are two methods. One is pass-through and the other is using the Tech 2 as a go-between.

Pass-thru programming allows the scan tool to remain connected to the terminal and to the vehicle throughout the programming process. The vehicle must be in close proximity to the terminal while using pass-thru programming
gm-tech2-pass-thru-programming-1
IMPORTANT: TIS2000 supports Service Programming with the Tech 2 scan tool only

Note: Tech2 pass-through or go-between Method:

How to do Pass-Thru Programming with TIS2000?

  1. Launch TIS2000.
  2. From the TIS2000 main screen, select the Service Programming System icon.
gm-tech2-pass-thru-programming-2
  1. At the Select Diagnostic Tool and Programming Process screen:
gm-tech2-pass-thru-programming-3
  • Select Pass-Thru under “Select Diagnostic Tool.”
  • Under “Select Programming Process,” select Reprogram ECU or Replace and Program ECU,
depending on whether you are reprogramming an existing module or replacing a module.
  • Under “Select ECU Location,” select Vehicle or Off Board Programming Adapter (OBPA), depending
on whether you are performing on-vehicle or off-board programming.
  • Select Next
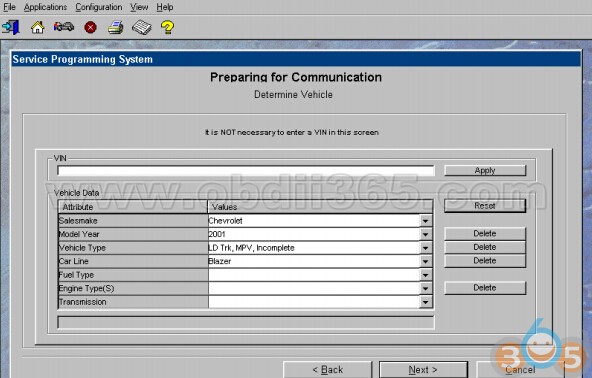
  1. At the Preparing for Communication “Determine Vehicle” screen, complete all terminal directed data until Next is highlighted (vehicle data will vary). Select Next.
gm-tech2-pass-thru-programming-4
IMPORTANT: In order to reduce the potential for signal loss, the RS-232 cable should not be more than 25 feet long.
  1. Follow the instructions on the Preparing for Communication screen, then select Next.
gm-tech2-pass-thru-programming-6
  1. Verify the VIN at the Validate Vehicle Identification Number (VIN) screen. Select Next.
gm-tech2-pass-thru-programming-7
If the option screen appears: Enter all information, then select Next.

IMPORTANT: If the vehicle identification number (VIN) does not appear correctly, the correct VIN must be entered.

  1. At the Supported Controllers screen:
gm-tech2-pass-thru-programming-8
  • Select the appropriate control module under “Select Controller,” e.g. PCM/VCM Powertrain/Vehicle
Control Module. Options available in the Select Controller box will vary depending upon the VIN
number entered at the previous screen.
  • Select the appropriate programming type (Normal, VCI, or Reconfigure).
  • Select Next.

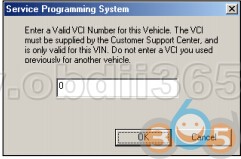
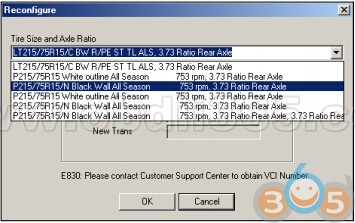
IMPORTANT: When selecting the vehicle configuration index (VCI) programming type, a valid VCI number for the vehicle must be entered. This number may be obtained from the Techline Customer Support Center. The correct tire size and axle ratio must be highlighted and a valid VCI number entered if you select Reconfigure for your programming type. Select Cancel if you receive a message stating that the calibration selected is already the current calibration in the control module and reprogramming with the same download is not allowed.

  • If you select VCI for your programming type, the VCI number entry box appears.
gm-tech2-pass-thru-programming-9
Enter a valid VCI number for this vehicle (obtained from Customer Support) and select OK.
  • If you select Reconfigure for your programming type, the Reconfigure box appears.
gm-tech2-pass-thru-programming-10
Select the correct tire size and axle ratio, then select OK. The VCI number entry box appears. Enter a valid VCI number for this vehicle and select OK.
gm-tech2-pass-thru-programming-11
  1. At the Calibration Selection screen:
gm-tech2-pass-thru-programming-12
  • Select the appropriate calibration(s).
  • Make sure all folder tabs have a green check mark.
  • Select Next.
  1. At the Summary screen:
gm-tech2-pass-thru-programming-13
  • Verify current calibration(s) with selected calibration(s).
  • Select Next.

IMPORTANT: Some vehicles will require that Idle Learn, TP Learn, Theft Deterrent Relearn, or Crankshaft Variation Learn procedures be performed after programming. Consult the appropriate service information for these procedures

  • If calibrations are the same, the NAODRUI Control box will appear. Select OK.
gm-tech2-pass-thru-programming-14
  • On model year 1996 and newer controllers, a Crankshaft Position notice may appear under “Controller Specific Instructions” on the Program Controller screen. Select OK.
  • The Transfer Data screen appears as reprogramming begins, finishing when the percentage bar reaches 100 per cent. This may take up to 30 minutes.
gm-tech2-pass-thru-programming-15
  1. The Program Controller “Programming Complete” screen appears. Select Close. The program will return to the TIS2000 main screen. Be sure to verify successful reprogramming.
gm-tech2-pass-thru-programming-16
  1. Turn off the GM tech 2 scanner.
  2. Disconnect the Tech 2 from the vehicle.