Showing posts with label Opel tech2. Show all posts

Wednesday, August 15, 2018

Tech 2 and OPCOM: which is better for Opel steering angle sensor reset?

Here are tips and guides of Opel steering angle sensor (SAS) calibration, incl SAS GM scan tools and FAQs…

What is steering angle sensor:
The steering angle sensor (SAS) is a critical part of the ESC system that measures the steering wheel position angle and rate of turn. A scan tool can be used to obtain this data in degrees. The SAS is located in a sensor cluster in the steering column.

Opel Tech 2 and Op-com, which is better for SAS reset:
With Tech2 you don’t need a PIN code.
Saab doesn’t have PIN code like Opel.
How to reset Opel steering angle sensor:

Tech 2 steering angle sensor calibration:
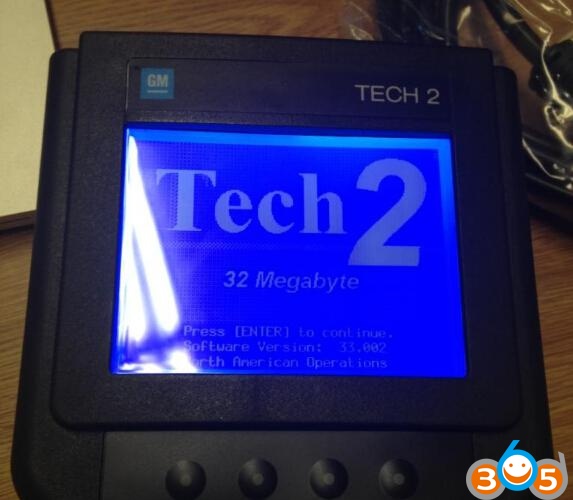
tech2-opel-srs-reset
Here is the procedure with Tech2:
Calibrating the steering wheel angle sensor
Note
The wheel alignment must be correct before calibration is carried out.
1. Put the wheels straight ahead.
2. Connect the diagnostic tool.
3. Select Steering Angle Sensor Calibration. Follow the instructions displayed.
4. Read and clear diagnostic trouble codes.
5. Test drive the vehicle.


Op-com steering angle sensor calibration:
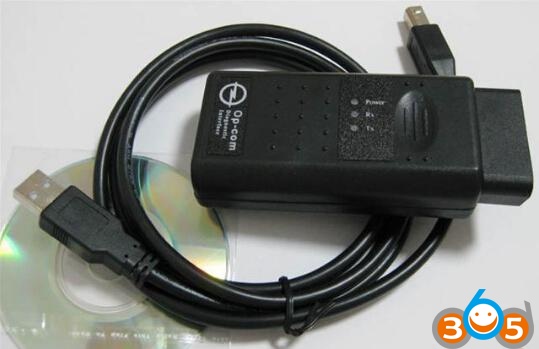
opcom-srs-reset
  1. 1. Disconnect the battery and the steering angle sensor lose its basic setting
    2. Remove airbag and steering wheel following the usual precautions
    3. Move the center rotor of the CIM to align the 2 triangles
    4. Connect the op-com interface with computer via USB port than install the software
    5. Plug the op-com unit into the vehicle USB port after succeeded installing software
    6.  Op-com will turn out the ESP light but not very first and second time
    7.  Turn on the vehicle ignition switch and start the vehicle.
    8.  Drive in a short distance straight line on a level surface at the speed not higher than 20 km/h.
    9.  When the steering wheel is straight, stop the vehicle with the wheels pointed straight. Make sure the vehicle is not move again.
    10.  Come to the op-com main function menu, select “Op-com Diagnostic”>> Vehicle year “2006”>>Vehicle model “Astra-H”>>Body>>CIM (Steering Column Module. >> Measuring block 3>>Steering Angle Sensor offset – set to 0.00 by slightly moving steering wheel
    11.  Back to the CIM screen, select “Programming”. Enter the security code if the system asks for it. Then click “Yes” when the system accepts the security code.
    12.  Go back to the programming screen, select “Steering angle calibration”, if the system still showed steering angle calibrated, choose “No, choose Activate and waited”. Otherwise, select “Yes” when the system displays steering angle calibrated.
    13.  The ESP light then came on with ignition as normal and went out after a few seconds


FAQs: steering angle sensors (SAS)  

How long have steering angle sensors (SAS) been in use?These sensors have been in use on certain vehicles since the early 1990s, but became commonplace by 1998.

Why does the SAS need to be calibrated or reset after a wheel alignment?Because it is required by the OEM.

When did OEMs begin requiring SAS reset with alignment?Some as early as 2003, others as recently as 2008, though some 2008 models were specified as early as 2002. Hunter’s WinAlign software has always provided vehicle specific screens that advised technicians that special equipment and software would be required to complete the alignment.

Why am I just now hearing that SAS need service?Because many newer on-board systems such as electronic stability control and electric power steering rely on accurate input of the driver’s intentions. This input is provided by the SAS)

Why do some OEMs require SAS reset in conjunction with alignment on only particular models or model year of vehicles?Each OEM has their own specific selection criteria on which vehicles are affected.

Why don’t all OEMs require reset after alignment?Each OEM has its own service requirement criteria. Most OEMs have only added the requirement in the last few years. Some as recently as 2008.

Does the SAS need to calibrated or reset if thrust angle is not changed during the wheel alignment?Yes. Thrust angle is only one of many conditions causing the SAS to report a value other than zero when the front wheels are steered straight-ahead based on the thrust angle.

Why do some SAS reset procedures require the vehicle to be driven a given distance to complete the procedure?Each vehicle manufacturer develops the SAS reset procedure based on the technology and design of the system. In some cases, a test drive is needed for the vehicle’s ECM to verify proper operation. CodeLink will indicate which specific vehicles require a test drive.

Do SAS automatically calibrate themselves after the vehicle has been driven a given distance?On some vehicles, SAS is automatically calibrated; on other vehicles, it is not. In either case, OEM mandates determine whether SAS reset is required after wheel alignment. Always follow the OEM’s recommended service procedures.

What may happen if the SAS requires calibration or reset and the process is ignored?A variety of symptoms may result from a SAS reporting inaccurate information. Examples of such symptoms may be a shutdown of the electronic stability control system, untimely application of individual brakes, steering wheel vibration or a vehicle that drifts of pulls in one direction.


Wednesday, May 24, 2017

Tech2 Opel Vauxhall 184 bins & GDS2 2017 Download Free

This is a collection of the current version of Opel Tech2 Vauxhall 184.000 .bin files download free for everyone that uses it for diagnostics in all the 26 languages that it comes in.

Free download Opel Vauxhall 184.000 bins
*The .bin files also work with Tech2Win.

Free download Opel Vauxhall GDS2 deliverable.rar
*This included the Opel Vauxhall deliverable package (1/2017) for GDS2 Diagnostics.


Here are something to those new to this....

Where do I put files please?

The .bins are for either programming your Tech2 32mb memory card with or used with Tech2Win on your computer.

For Tech2Win you can put the .bin anywhere you want just point Tech2Win in the location of where you put it so it can boot it up.

For example:

Start Tech2Win, Select Modify / View, Click the grey square to the right that says create new, in the drop down box on the left select default, in the Please enter new name box to the right name it Opel184 Bin, Click Copy then ok, Now click the grey square to the right of where it says "Slot 0: memory card image location" and in the pop up window find the location where you put your .bin file and click on it then click on Save in the lower left hand corner then ok. Now click on the greenish square named Opel184 Bin to boot the .bin up in Tech2Win.

For the Tech2 memorycard You need to have another software called "Memory Card Explorer" to program the .bin to your memory card with in the pcmcia slot in an old laptop that has it, or another software called "Card Writer" to program your Tech2 memory card in the Tech2 connected to your computer with a J2534 connection the same as you would connect your Tech2 to your computer for SPS programming.

How is GDS2 updated?

This is a copy that someone had posted this info in another post but it here for you all to make it easy. If this don't work, you may need a newer version of GDS2 software if your is very old just so you know just in case of that happening

1. Select to show hidden files and folders in windows.

2. Put deliverable in location below and remove current deliverable in there,

C:, ProgramData, GDS 2, PersistentData, Downloads, DataBackups

3. Start GDS 2, and go to Manage Diagnostics Packages, click on Browse, in the open window find the deliverable at the same location you put it in above, click on it and then click open. GDS 2 will restart, Close out of GDS 2.

4. Go back to this location,

C:, ProgramData, GDS 2, PersistentData, Downloads

5. Go in folder "CurrentRelease" copy file "deliverable_OpelVauxhall v2017.01.0" and place into folder "Deliverables" and delete the file that is in there so there isn't two different ones.

6. Restart GDS 2 and it should be up and working to diagnose.


* Credits to spkmal2 in the MHH community.

Monday, December 7, 2015

How to disable Corvette C5 F55 with GM Tech2 scanner

So here I would like to share my experience disabling F55 and reflashing DBS using GM Tech2 scan tool. I have a 2005 c5 F55 with heads, cam, injectors, etc. tuned with HP tuners. I did some search about having the DBS reflash and F55 disable done and I read in a couple blogs and threads that people are unsure whether the DBS reflash or any other BCM changes will affect custom ECU tunes. I had the tech do these two changes to the BCM and checked the car after each.
Disclaimer: Please strictly follow the steps in case anything goes wrong. The F55 disabling and DBS reflashing are on your own risk.
First I had the tech do the DBS reflash for me in about 10 min. My tune was NOT affected and the car started and ran normally.
I then had him disable the F55 suspension. Again, my tune was NOT affected and the car started and ran normally.
It is also worth noting that HP Tuners can NOT make changes to the BCM.
If you are looking to disable your F55 using the GM TECH 2 scanner:
1. Hook up Tech 2, turn car ON, make sure module in the rear is PLUGGED IN. Do Not unplug the rear module.
2. Go to diagnostics — Body — BCM — BCM Special functions — BCM Setup.
3. Delete the F45 option ( F55 did not appear on the menu screen on the Tech 2, use F45)
F55 did not appear on the menu screen on the Tech 2, use F45
4. Save new configuration.
5. Do not turn car off, do not remove Tech 2, go to the module in the rear of the car, unplug the grey connector( the widest one) leave the center plug in and the smaller black plug in.
6. Turn off car leave Tech 2 plugged in.
7. Remove remaining plugs from module in the rear of car.
8. Turn car on to verify the “Max speed 80 mph” is gone.
9. Unplug Tech 2 and put tools away.
Then you have to follow the bouncing ball of checking off RPO Codes. When you get to F55 set it to disabled.

How to disable GM Saab TPMS with GM Tech2 scanner

Equipment:
GM Tech2Ⅱ scanner
CANdi interface (CANBUS)
32 MB PCMPIA memory card
A subscription Saab TIS2000 software CD
A laptop with wireless internet connection
NOTE:
CANdi interface, TIS2000 software CD and 32 MB card for gm tech2 can be purchased separately. GM Tech2 scan tool often comes with CANdi interface or TIS2000 software CD, you need to get the left stuff. If you need to do Saab vehicles, choose specific Saab TIS2000 software instead.
Vehicle model example: GM Saab 9-3
Instruction:
ⅠRemove BCM
Install 32MB card into GM Tech2 diagnostic scanner.
Install 32MB card into GM Tech2
Install GM Tech2 scan tool with CANdi interface connect it with vehicle via OBD socket
Install GM Tech2 scan tool with CANdi interface
Select model year
Select 9-3(9440)
Select Diagnostics
Select ALL
Select Add/Remove
Select BCM (Body Control Module)
Select Remove
ⅡRe-add the BCM
After removed the BCM, repeat the previous procedures and select Add
At this time, GM tech2 will list long lists of options for the car, like truck the presence of several optional items, like trunk switch in driver’s door, sunroof, TPMS, etc. For the functions you are not sure, Tech II scanner has an Auto-Suggest feature, where it will suggest the correct option.
Select vehicle region: EU (Europe)
(Do not select US for cars in US market are strictly set)
Select “Without TPMS” when the system pops out TPMS is preset notice
Answer the system questions prompted and instructions
Ⅲ Disable TPMS
Select model year
Select 9-3 (9440)
Select Diagnostics
Select All
Select Add/Remove
Select TPMM (Tire Pressure Monitoring Module)
Select Remove
The TPMS is successfully disabled.
Disconnect GM Tech2 from car’s OBD diagnostic socket.

Friday, November 13, 2015

GM Tech2 scanner RS232 cable self test guide

If you need to run TIS2000 software on PC, you have to connect GM Tech2 scanner using the RS232 cable with the DB9 Adapter to a serial COM Port at the PC. If you cannot get the Tech 2 scan tool connect to PC or fail to communication well, the best way is to connect the RS232-DB9 adapter correctly and then run a RS232 self test.
GM Tech2 gm diagnostic scanner comes with several connectors, including a RS232 cable and RS232-DB9 adapter (mark red circle below)
1) Follow the cable pinout to connect the cable correctly
Tech2 DB9-JR45 RS232 cable adapter pinout


BD-9 to RJ45
1——-2
2——-4
3——–5
4——–8
5——–7
6——–1
7——–3
8——–6
9——–not connected

2) Then do a RS232 cable self test
How to do Tech 2 RS232 self test?
1. Power up the Tech2. Connect RS232 cable with Tech II scanner main unit.
2. Come to main menu. Select F4:Tool Options
3. Select F3: Self Test
4. Follow the system prompts:
Before running the Tech 2 self test:
CANdi interface must not be connected
ALDL loopback should be connected
Failure to follow these instructions may invalidate the self test
Press EXIT to continue
5. Select F3: Selectable main PCB
6. Select F2:RS232 LoopBack
7. Tech2 RS232 cable self test has passed

If RS232 cable passes self test, the commutation between Tech2 scanner and PC is well built.


Thursday, November 12, 2015

GM Tech II Tech 2 Diagnostic Scanner Overview

The GM Tech 2 diagnostic tool is the dealer level diagnostic scan tool for GM group (GM, Saab, Opel/Vauxhall, SUZIKI, Holden etc).The Vetronix Tech 2 contains Authentic GM software and provides support for on-board diagnostics on all GM systems 1992 thru 2011. Tech II has been around since the 1980's. It has been the flagship diagnostic tool and programming device for many many years. it continues to be a valuable part of the GM dealership stable because its quick, efficient, and works great!

TIS2000 for GM can programming GM Models before 2007 year. (GM TIS2000 comes with the parcel, no need buy alone)
TIS2000 for SAAB can programming SAAB Models before 2007 year. (SAAB TIS2000 Need Buy Alone)
Multi-Language: English/ German/ Spanish/ Japanese/ French/ Italian

Comparison Among Our Five GM Tech2 Tool:

Item NumberPackageWeightHot Degree
SP23Plastic Box9.10KG★★★★★
SP23-B3Carton Box3.50KG★★★★☆
SP23-BPlastic Box9.10KG★★★☆
SP23-CPlastic Box9.10KG★★★★
SP23-1No  Box4.60KG★★★☆

GM Tech2 Candi Connection Display:
gm-tech2-candi-connection-display-1


GM Tech2 No Candi Connection Display:
gm-tech2-candi-connection-display-2


Software Version:

For GM
GM-English 32.008 1991-2013
GM-Germany 32.008 1991-2013
GM-Spanish 32.008 1991-2013
GM-Japanese 32.008 1991-2013
GM-French 32.008 1991-2013
GM-Thai 32.008 1991-2013
GM-Portuguese 32.008 1991-2013
GM-Korean 32.008 1991-2013

For SAAB
SAAB-English 148.000

For OPEL
OPEL-English V165 1997-2014
OPEL-Italian 133.001 1997-2012
OPEL-Germany 85.001 1997-2008
OPEL-Spanish 91.001 1997-2009

For Holden
HOLDEN-English V149 1999-2013

For SUZUKI
SUZUKI-English 01.210.020

For ISUZU
ISUZU-English CAN-BUS 107.021 2010- (CAN-BUS support car models after 2010)
ISUZU-English K-Line 11.62 1996-2013 (K-line support car models from 1996 to 2011)

GM TECH2 Features:

1) Authentic GM software in the Tech 2 Flash means the most comprehensive diagnostic software available for late model GM vehicles.

2) Support for on-board diagnostics on all GM systems 1992 thru current year.

3) Removable hardware modules provide insurance against scan tool obsolescence.

4) Large, easy-to-read backlit screen.

5) RS232 & RS485 ports provide the avenue to connect future devices to your Tech 2 Flash.

6) Ability to capture stored DTCs, Freeze Frame, and Failure Record for later review.

7) Ability to view the status of vehicle diagnostic tests as they run.

8) Bi-directional The authentic GM 1992-current year software will provide full bi-directional control when performing power train, chassis, and body diagnostics.


Vetronix Tech 2 Specifications:

1) Microprocessor: 32 bit,16 MHz

2) Memory: 32 MB flash type II PCMCIA. Type III slot available for future expansion.

3) Communications: Integral RS232 communication port.

4) Screen: 3.8.8 backlit monochrome with full graphics capability: 320,40 pixels. Displays up to 9 vehicle parameters at once .Download Tech2 Brochure (5.2 Mb)

An industry change in protocol from OBD II to Controller Area Network (CAN) has begun. In order to perform diagnostics on a vehicle that uses the CAN interface;

You will need the Tech 2 Flash and a CAN diagnostic interface module. The module connects between the Tech 2 Flashs diagnostic link cable and the OBD adapter.

Once the module is connected, it can be used on all GM vehicle applications,even those vehicles using other platforms such as OBD I and OBD II.


GM vehicles utilize the CANdi interface
05 Buick Allure (3.6L)
05 Buick LaCrosse (3.6L)
05 Buick Rainier (5.3L)
04-05 Buick Rendezvous (3.6L)
04-05 Cadillac CTS (3.6L)
04-05 Cadillac SRX (3.6L / 4.6L)
04-05 Cadillac XLR (4.6L)
05 Cadillac STS (3.6L / 4.6L)
05 Chevrolet Cobalt (2.2L)
05 Chevrolet Corvette (6.0L)
05 Chevrolet Equinox (3.4L)
05 Chevrolet TrailBlazer (5.3L)
05 Chevrolet SSR (6.0L)
04 Chevrolet Malibu (Body/Chassis only)
05 Chevrolet Malibu (3.5L)
05 GMC Envoy (5.3L)
05 Pontiac G6 (3.5L)
05 Pontiac GTO (6.0L)
05 Pontiac Pursuit (2.2L)