Thursday, March 9, 2023

GM Tech2 Adds TPMS Sensors to Corvette C5

 Here we share users’ experience with those wanting to add TPMS sensors to their Chevrolet Corvette C5 Z06.


Background:

He recently replaced the Bridgestone Potenza RE760 tires on C5 Z06 with new Continental ExtremeContact Sport tires in the following sizes on OEM Z06 wheels (Frt: 255/40/17 and Rr: 295/35/18) so when he did that he decided to add TPMS sensors to the wheels and then enable the TPMS system in the DIC.

Here’s what you’ll need:
– Four TPMS sensors (he ordered these through Rock Auto. They are Schrader Model# 20117. Schrader makes the OEM sensors and these are the exact same as OE but only cost $20.79/ea, so the total cost was around $88 for all four)
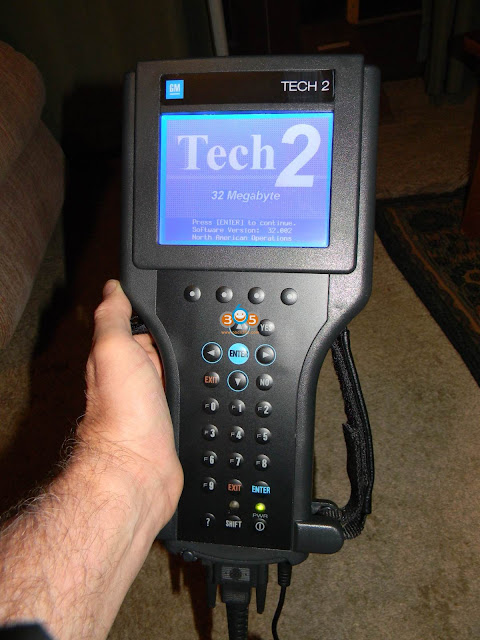
GM TECH2 scan tool device (i got a clone from obdii365.com)
– A strong magnet, preferably round


So first you’ll need to add the TPMS sensors (Schrader Model 20117 or OE/ACDELCO# 25773946) to your wheels. Be sure to NOT overtighten the sensor nut when installing them. The torque spec is 62 inch/pounds (NOT foot/pounds) so be very careful. Once the tires/wheels are installed on the car, connect the TECH2 device to the OBDII port on the underside of the dash and then put the key in the ignition and turn it to “On”. You do not need to actually start the car.

Here’s a link that shows what to do:

How to adding Corvette RPO option codes with GM Tech2

And here’s a YouTube Video showing the TECH2 steps as well:

The steps are the following:

1. F0: Diagnostics
2. Select Model Year (Mine was 2002)
3. Select Vehicle Type = Passenger Car
4. F1: Body
5. Select Product Line = Y
6. Select Body Style = (1) Two-Door Coupe/Sedan
7. Select Transmission = Manual
8. Body = F5: Remote Function Actuation
9. F2: Special Functions
10. F0: Set Options
11. F0: Tire Pressure Monitor
12. Toggle the function “On” and then hit the “Save Options” and power off the TECH2 scanner.

Once that’s done, the next step is to put the DIC in the ‘Learn Tire” mode.

Here’s a YouTube link for that:

1. Press “RESET” button on the right hand side of the dash to clear any codes in the DIC like “Door Ajar” and other codes.
2. Press the “OPTIONS” button and cycle through the display until you get a blank screen on the DIC.
3. Press and hold the “RESET button until “FOB TRAINING” displays in the DIC.
4. Press the “OPTIONS” button once to display “TIRE TRAINING” in the DIC.
5. Press the “RESET” button to start the tire training. It should display “LEARN L FRONT TIRE” in the DIC.
6. This is the most important step. You will need to use a strong circular magnet and place it near the tire valve stem and then wait for the horn chirp. Next go in a clockwise manner to the Right Front sensor waiting again for the horn chirp and then the Right Rear and then finally the Left Rear.
7. Your TPMS sensors should now be programmed and available for viewing using the “GAGES” button.

Just an FYI, you MUST use a strong magnet for the tire learning phase. The normal tire learning devices at tire stores and dealerships WILL NOT WORK when learning the sensors.

Hope that helps. This was really inexpensive to do but very useful. It’s great to know now you have the TPMS system active in Z06 so you can check the tires anytime while driving.

Thursday, December 23, 2021

GM Tech2 Clone Pontiac Firebird Review

I did get one of those GM Tech-2 clones. Got it here with a plastic case.

https://www.obdii365.com/wholesale/high-quality-gm-tech2-gm-diagnostic-scanner-1362.html

GM Tech2 Clone Pontiac Firebird Review 1
Tech2 clone

GM Tech2 Clone Pontiac Firebird Review 2
Tech2 clone handheld

GM Tech2 Clone Pontiac Firebird Review 3
the CANdi module

GM Tech2 Clone Pontiac Firebird Review 4
Tech2 case

It looks nice with no visible defects except for the main 'Tech 2" label on top which is slightly too large for the recess where it is stuck. Only had it a day now and after using it for a coupe of hours, the "Oh-no I bought a DOA lemon with no way to return it !"  devil hasn't appeared yet. It seems to do everything as advertised, as much as I can tell for now. All the Bi-directional actuators work fine. The graphs and tables of PID's look good. Can read the ABS, SIR, and body modules ok. It came with a 2013 data set already installed, and while I may have to order updates from China from now on, that's ok with me. I may ever need them.


It's larger than I thought, almost takes two hands to carry. The OBD cable is huge, presumably meant for heavy shop usage. The firmware covers the 1991-2013 years, including Saturns. The case is the size of a small/medium size suitcase. There are 5 adapters and 3 power cables (AC, cigar lighter, and battery clips).


I read many, many questions from other people who asked for any recommendations in buying one, why not? It is cheap and working !

Still going strong after many uses. Used it to troubleshoot a cooling fan noise issue. It was nice to be able to switch the fan(s) on and off whenever I wanted.

Sunday, November 14, 2021

GM Tech2 Clone Duramax Review

 Since all I drive is GM vehicles I figured I should own a GM scanner under $300.  I have done some research online and found a working Tech II clone with positive reviews.

I just ordered a Tech2 Chinese clone latest night. I didn’t pay extra $55 just for the stupid plastic box.

Here is the unit I purchased for reference:

https://www.obdii365.com/wholesale/gm-tech2-gm-diagnostic-scanner-with-32mb-card-tis2000.html

Shipping was free and fast.  The package shipped from Hong Kong on Monday and arrived at my door on Thursday. Amazing!  Everything appears to be as advertised, except I didn’t receive all of the stickers. Not a huge deal.  Here are a few pictures I snapped with my phone. The tech2 clone has 2 pins on the top middle row that stick out a hair further than the others.  I saw a youtube video of a guy who noticed the same thing, but he said it worked fine.

GM Tech2 Clone Duramax Review 1

GM Tech2 Clone Duramax Review 2

GM Tech2 Clone Duramax Review 3

GM Tech2 Clone Duramax Review 4

Apparently there IS a medium duty truck option. I will take the Tech 2 to work on Monday and try hooking up to a GMC 5500 Duramax. They have a medium duty diagnostics port AND an OBD2 port under the dash. I have used a Snap-On scanner on these medium duty trucks before, and now I am excited to try the Tech 2!

GM Tech2 Clone Duramax Review 5

Here is some engine data from my 2.2L beast. I started the engine and watched everything live. I also recorded some “snapshot” data and re-watched it. Pretty cool. I know most modern scanners can also do this.

GM Tech2 Clone Duramax Review 6

Checking for Air Bag codes/communications. I did not have any DTCs. It is nice to know I can pull airbag codes and look at data!
GM Tech2 Clone Duramax Review 7

GM Tech2 Clone Duramax Review 8

I was able to auto bleed the ABS system. I felt the ABS pump vibrating through the pedal. I have done this at work after replacing rusty brake lines coming out of the ABS pump. Very useful, because it is nearly impossible to get air out of the ABS pump without being able to “auto bleed.”
Overall I am very pleased with the function of the Chinese GM Tech 2. This technology is ancient by today’s standards, so it’s no surprise the Chinese are able to easily duplicate the tool and the basic software. I am headed to purchase a laptop and then I will download the TIS2000 software in order to program modules. One more cool thing I found in the “Chassis” section. Tire sizes. I can select a different tire size if I change my wheels and tires, therefore keeping the speedometer accurate. I think that’s cool as hell!

GM Tech2 Clone Duramax Review 9

http://blog.obdii365.com/2021/11/15/gm-tech2-china-clone-review-on-gmc-duramax/

Thursday, June 17, 2021

Saab 2006 Rear Window Express Program Retrofit with Tech2

 Rear window "express-up" retrofit

So, as we all know, in 2006 and newer models, SAAB got rid of the express-up feature for the rear door windows when controlled from the driver's switchpack. Call it GM "decontenting" or maybe due to societal stupidity and potential lawsuits (?), whatever the reason, I really like the feature and it's always driven me nuts that the switches are there but don't work as they should. It's like dangling candy in front of a baby! :evil: I probably wouldn't even have thought to do this if SAAB hadn't kept using the driver's switchpack with double-detent rear window buttons! But they did. And I most always drive with my windows down, especially the drivers window and the window directly behind me (so I don't get buffeted in the face, try it sometime!).

So, with that said, here's how to retrofit express-up windows into your 2006+ sedan or Combi.

You'll need the following parts:

- Rear left window motor (6-pin version), part number 12788801
- Rear right window motor (6-pin version), part number 12788802

- Rear left window regulator (pinch-protection version), part number 12793730
- Rear right window regulator (pinch-protection version), part number 12793731

- Rear left door harness (w/6 pin motor connection), part number 12785580
- Rear right door harness (w/6 pin motor connection), part number 12785581

- GM Tech 2, CANdi box, security access with TIS2000 subscription

- Patience and a good chunk of time

Everything is literally plug and play once you've sourced the correct parts. Remove and replace the regulators, motors, and harnesses. Not hard to do at all. 

The only exception is if you have rear door speakers like I do (apparently not that common?). You'll have to transplant the speaker harness into the new harness to keep the speakers. Couple of thoughts on this: rear door speakers really don't do a whole lot, so it's not a deal-breaker if you don't feel like doing this. Or if you want, you can just make a new harness for the speakers. I wanted to do it factory-style, so I moved the harness, moved the pins, re-wrapped the harness, etc.

After everything is in, it won't work. Don't worry! You still need to program the RLDM and RRDM (rear left and right door modules). In comes the Tech 2:

1. Get security access.
2. Diagnostics, select year and car, select "All".
3. Add/Remove.
4. Remove both the RLDM and RRDM.
5. Add the RLDM and RRDM, specify "With Anti-Pinch Motors". Also select "EU" for Market just in case. Here's the tricky part, where I almost gave up! DO NOT SELECT THE YEAR OF YOUR CAR. It won't work. You have to "trick" the system. Select 2004 when it asks the year of the car.
6. Once the modules have been added back in, calibrate the rear window pinch protection just as you would the front windows. You'll hear a "beep" from the SID letting you know the windows have been calibrated.
7. Enjoy your express-up windows!

This may seem trivial but I literally yelped when it finally worked. 
 What good are auto-up windows if only 2 of the 4 work?

Hope that helps anyone else looking to do this!

Tuesday, March 9, 2021

GM Saab PSG16 Programming by Tech2 via SPS

 Question:

I need to program a psg16 pump vp44 (the Opel Vectra 2.2 dti car got several electrical errors due to a PSG16 change). I see that gm tech2 scanner can do it. If I buy a new PCMCIA card, can I get it working? the MDI/MDI2 can I also program?
Answer:
You can flash/swap PSG16 pump via SPS original software.
If you want to program PSG16 you can easily do it with tech2 and TIS2000, GlobalTis v32 or Tis2web. You can buy any card because you can overwrite the software that you need from TIS.
You also can use GM MDI or GM MDI2 or AVDI or any good/approved J2534 tool can be used to do SPS Programming in PSG16.
You download sps on PCMCIA card then cut from card read.
gm-tech2-psg16-sps-programming

EDC 15 / PSG 16 Reprogramming by Tech2 via SPS

Follow the description below carefully to ensure success.


1. Connect TECH2 scan tool to the data link connector.

2. Start TECH2 and select F5: Service Programming System (SPS).

3. Select F0: Request Information.

4. Then select: model year, vehicle type, group, system

5. Follow the instructions in TECH2.

6. Disconnect TECH2 from the vehicle and connect it to the COM port of the computer (flat cable). TIS2000 must be installed on the computer.

7. Check that the software of the computer is newer than that of EDC 15/PSG 16. If so, download it to TECH2.

8. Disconnect TECH2 from the computer and reconnect it to the vehicle.

9. Start TECH2 and select F5: Service Programming System (SPS).

10. Select F1: Program control module.

11. Follow the instructions in TECH2.

12. Wait until programming is complete. This takes approx. 7 minutes.

13. Once programming is complete: switch off the ignition.

14. Test start the engine.

15. Read and clear any DTCs in the control unit. A DTC will be generated because the pump control unit loses communication with EDC 15/PSG 16 during programming.

16. Final check:

Clear DTCs in all systems.

Execute one operating cycle (run the vehicle at varying engine load and speed for five minutes).

Evaluate the operating cycle (check that DTCs were not regenerated).


http://blog.obdii365.com/2021/03/09/gm-saab-psg16-pump-sps-programming-via-tech2/

Wednesday, December 30, 2020

Diagnose C5 Corvette: GM Tech2 vs VCX Nano

 After receiving GM Tech2 scanner as a 2020 Christmas gift from my brother (look at the following image), some friends are kind jealous (hahaha) because they think it is a great gift and saying I’ll get many uses for this tool. it is a $250-300.

C5 Corvette tech2


I have done a bunch of job with GM Tech2, here I take some for examples:

  1. You can do an automatic bleed on the brakes with it, and bleed the abs pump. Without it you aren’t really able to bleed the system completely.


  1. I know my brother was happy that we could use the tech 2 on his 95 k1500 too.


  1. Tried to pay my brother back some by using the tech 2 to pull some codes on his 95 k1500. Egr code came up. Also programmed my sisters (his wife) TPMS on her RX350 so she would quit complaining about the light to him.

    I also almost killed the battery in the corvette playing with the tech 2. Next time I gotta remember to hook up the charger before spending 20 minutes playing with it.


Next is VXDIAG VCX Nano GM scanner

C5 Corvette vxdiag vcx nano gm


I have the VCX Nano – which emulates the Tech 2 on a laptop. It works flawlessly and is installed on the same laptop as my HPTuners, Alldatadiy, etc. I have turned a laptop into a great all in one diagnostic tool for all my corvette needs – or just to look like a complete fast and furious nerd to my neighbors. One of whom is a old school hot rodder with a 32 Ford coupe – and he LOVES making fun of all the technical growing pains I had building my car.


This is the obdii365 link to the VCX Nano:

https://www.obdii365.com/wholesale/vxdiag-vcx-nano-for-gm-opel-gds2-scanner.html


Here I’d like to answer several questions after I gave good feedback to VCX Nano:

  1. VCX Nano is all inclusive and is a complete functioning Tech 2.. The one thing I don’t think it can do is connect to GM servers and download updates to modules and systems.


  1. I just verified VCX Nano will do the RPO modifications. I haven’t found anything it won’t do aside from connect to GM servers – you can test every module on the car. It’s a pretty impressive tool to be honest.

C5 Corvette vxdiag vcx nano gm 2


  1. As far as computer requirements – I have it installed on a run of the mill laptop that was basic when it was new two years ago and would probably choke up on a heavy porn hub tasking. No issues at all.

    I bought it to cycle the ABS system when I replaced all of my brake fluid. And the few times it helped me after were diagnosing which fuel sending unit was dead (you can see voltage output from each sending unit) and when my passenger door regulator was gone (I could see the door module was still alive and doing what it was supposed to). However, a dude down the street has a C5 full of issues and we diagnosed which cylinder was misfiring, his faulty gauge cluster, and a few other things. Honestly it’s been handy for the $100.


So, That is amazing for the VCX Nano price. Definitely added to the wish list by someone.


To sum up:

To diagnose C5 Corvette, both GM Tech 2 clone and VXDIAG GM scanner are good. Even Tech 2 can work with old GM models. and VCX Nano can do RPO modifications etc.


http://blog.obdii365.com/2020/12/30/diagnose-c5-corvette-gm-tech2-vs-vxdiag/

Thursday, December 3, 2020

GM Tech2 Reset 05 Chevrolet Corvette Brake light

Car model and year:

2005 Chevrolet Corvette M6 base


Symptom:

Brake lights are not working. Including the 3rd brake light.


GM scanner:

  1. I do have an Autel 519.
  2. GM Tech II scanner (is a must tool)


What I tried to do:

Replaced the brake light switch. Swapped back in the original. Still no brake lights.


What should do next? (From experienced user)  

  1. When changing the BPS, did you do a relearn with a Tech II to calibrate it with the BCM.

    When you have the tech II on the car to do the BPS relearn, did you go into BCM data after to see if the pedal was signaling the BCM to turn on the brake lights?

    Hence problem could be BPS not calibrated correctly to start with at the BCM, or could be the wiring/rear bumper void connector, or just rear grounding the problem instead.

    And if you don’t own a Tech II ( at least clone) to work on the car, it’s your first mistake, since even basic items like brake pedal sensor replacement have to be calibrated to the BCM via the tool. So on that note, if you list your location, someone local may have a Tech II to put on the car, until you get your own.


  1. For Autel 519

The brake position sensor is a restate type device, not a on/off switch. So when it replaced in the car and since the each sensor will have a slightly different reading, the BCM has to learn it value when the pedal is not pushed, then when the pedal is pushed.

Double check your Autel 519, but not sure is has a BPS relearn for the GM cars on it, which is required when the brake pedal sensor is replaced.

Once the BPS vavlues have been learned to the BCM, then you can go into BCM data to make sure that the BCM is seeing the changing rates, and activating the brake lights. From here, then we are done to just the fuse and wiring from the BCM to the lights (then ground).

So again, could be the old BPS is worn, and its current resitance values are not the ones first leaned in, the replace values where never learned in, and why the BCM is not seeing the correct values to turn on the brake lights to begin with.


Finally, Solved!

I took the car to my friend’s shop. He fixed it in 5 minutes with a BPS relearn. I’m not sure why this was required. I did change out the switch but I put the original back in. Or the previous owner could have changed it and not known a relearn was required. He actually knocked quite a bit of money off the car because of this issue. Either way I have brake lights!


Good to know:

I have/used just about every Tech II / MDI device known, and it’s the VX GM Nano’s that I use the most (have one in both usb and wifi versions).
Hence it works at both a Tech II using cracked Tech2win software for the C6 and back cars for free that comes with it, and since it is a MDI clone to being with, works for C7 and newer cars running GSD2/TDS as well.

Hence the problem with the hand held tech II clones, is they only work on C6 or later cars, and not the newer cars that need MDI running GDS2 instead.
Regarding using TIS2000 with a hand held tech II clone, the unit only comes with a rs-232 connector cable, so you end up having to pick up a usb cable to connect it to a machine to run tis2000 instead.

So quick break down of GM software.
Tech2win is the same software that the hand held tech II’s runs internally, but runs it on a laptop instead. It’s used for diagnostics, and a few relearn type features.

Tis2000 is used for SPS firmware flashing of the C6 cars back. Note, there is the standard version that only goes up to 2009 cars, then there is the abroad version for spotty internet areas that will go up to 2013, since TDS may not work correctly if the area internet is not fast enough (think abroad where a service area may only have phone dial up).

GDS2 is the diagnostic and some relearn items for the 2014 and up cars.

TDS is the on-line SPS programming that replaced Tis2000 for the new cars from 2009 up for most firmware and special programming, even on the older cars.

As for the VX GM nano, runs all the above software, and in most cases (short of TDS that you would need to pay for a subscription), does so for free. Hence this is the reason that it’s favored, since it covers me on pretty much any GM car running no service fee software..


Credits to @Dano523 (CF Senior Member)


For the reliable clone GM TECH2, MDI and VXDIAG NANO GM, you are advised this one:

GM TECH2

GM MDI

VXDIAG NANO GM (USB)

VXDIAG NANO GM (WIFI)